A complete wind energy system often has wind turbines, towers, wind controllers, batteries, inverters, cables, and installation tools.
In this article, you will learn about their installation steps, connection process, precautions for use, etc.
In addition, there are many types of wind turbines. How should you choose? Click on the orange text to check their characteristics.

Categorised by the main axis core, they can roughly be divided into horizontal and vertical axis wind turbines.
And under these 2 major classifications, we can break down into 5 types that are currently popular on the market.
But not every type is suitable for us to use. There must be specific conditions before they can be installed and play their role.
Can wind turbines be installed anywhere?
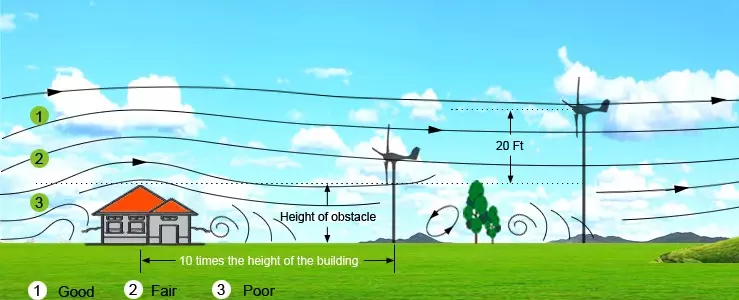
1- Wind turbines cannot be blocked by buildings in the vicinity.
For example, your house is 6 meters high and there are 9 meters high buildings within 10 meters of each other.
If the buildings are of such a size that they can completely block the wind turbine, at least a 12-meter tall tower would be required for installation.
Alternatively, your house’s roof has sufficient load-bearing capacity and can be installed on the roof. For specific design options, recommend contacting our experts.
2 – Average wind speed of at least 5m/s (16ft/s).
Although a wind speed of 3m/s will allow a wind turbine to start generating electricity, the amount of power generated is far from enough.
Most users will opt for a wind + sun complementary renewable energy solution.
3- Noise problem.
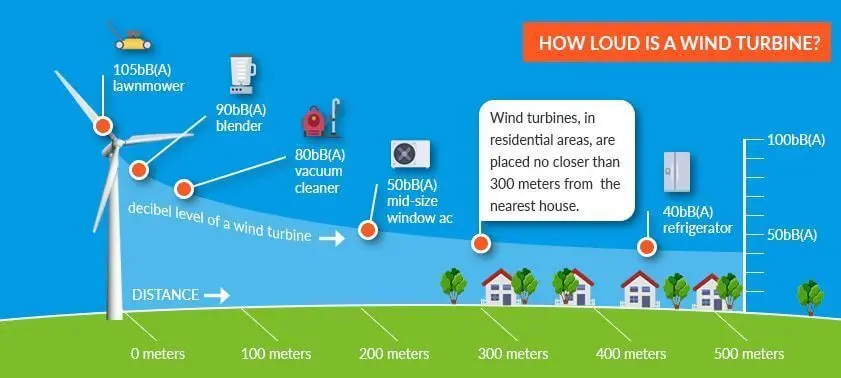
Through fieldwork and testing, we have learned that wind turbines produce 30db-50db of volume when turning to generate electricity.
Will this level affect people’s health and well-being? The reality is that the impact is very minimal, as 45db is equivalent to your pet cat snoring outside your room.
You can check out this blog to hear it.
Also, wind turbines come in a wide range of power, from 100kW to 1000kW. Does the energy produced match your electricity usage?
What size wind turbine do you need to install?
For an average 5-person household, electricity consumption is 1500kwh-2000kwh per month.
We need to refer to your electricity bill for the actual situation.
In areas where the average wind speed reaches above 5m/s, you can use a 10kW wind turbine for power supply.
6h x 10kw = 60kwh x 30 days = 1800kwh, and in areas with abundant wind resources (above 5m/s), you can fully consider the 5kw-10kw model.
After determining the model, how do we install wind turbines, as well as the correct role of the wind energy system.
Installation steps:
1-How to install the tower?
The tower is especially critical as a supporting part and is also the most basic part.
On the market, the more popular towers are guy cable pole, independent tower, hydraulic tower, etc.
Among them, their prices are sorted into Guy cable pole<Independent Rods< and Hydraulic Rods.
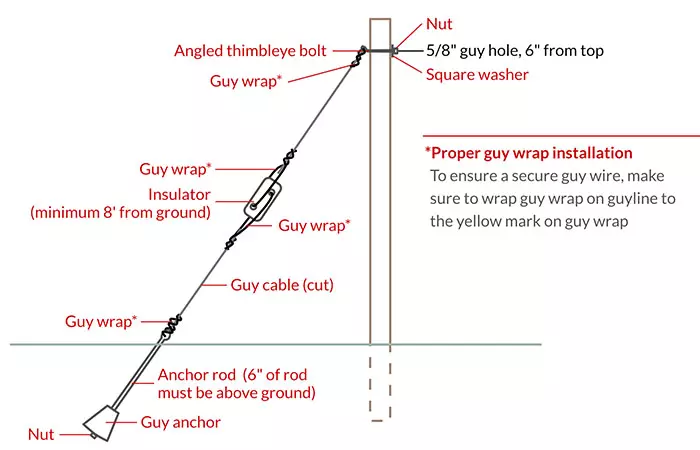
In addition to the different thicknesses and materials of the guy cable pole and independent rod, the guy cable pole has 4 more cables for fixing:
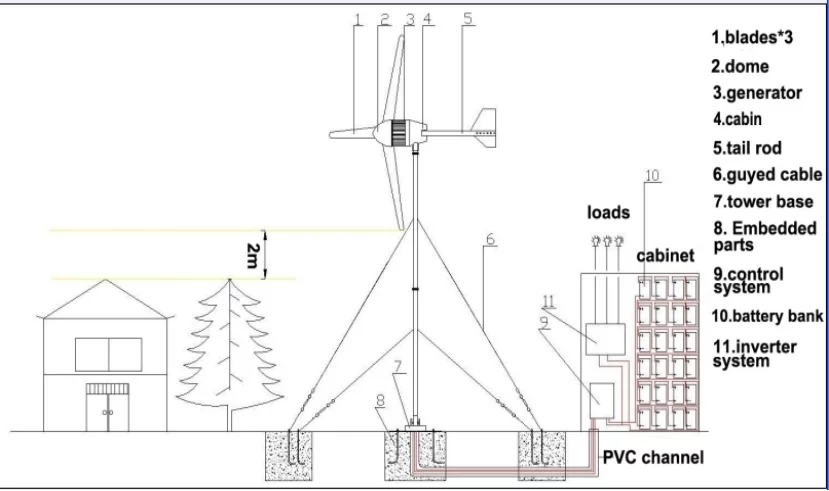
The independent rod is thicker and stronger than the guy cable rod, so no cable is needed for fixing.
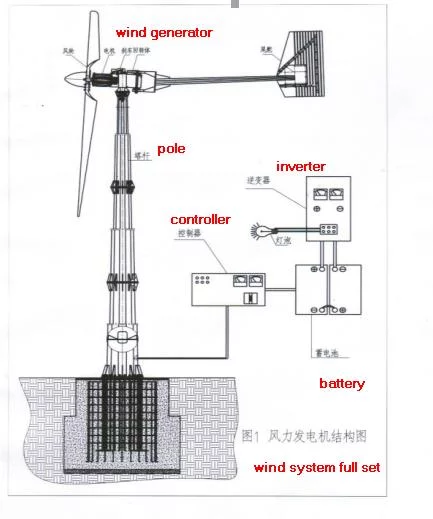
Take the 10kW model as an example. It usually matches 9 or 12 m tie rods or independent rods. You may wonder why there is no 9.6m or 5.5m tall tower.
Professional wind turbine manufacturers will tell you, this is to avoid wind turbine impeller 1P, and 3P resonance, causing collapse and property damage
So before you buy a tower, you need a professional team to tell you how high it should go.
Furthermore, if you’ve built your own house, you’ll understand that the foundation must be strong before anything can be fixed. Installing a tower is no different.
Both the 9-meter guy cable tower and free-standing tower require at least a 9-foot diameter hole to be dug.
And a culvert to bury the electrical wiring ( it also needs to be routed through the tower to reach the nacelle) before the concrete is poured in.
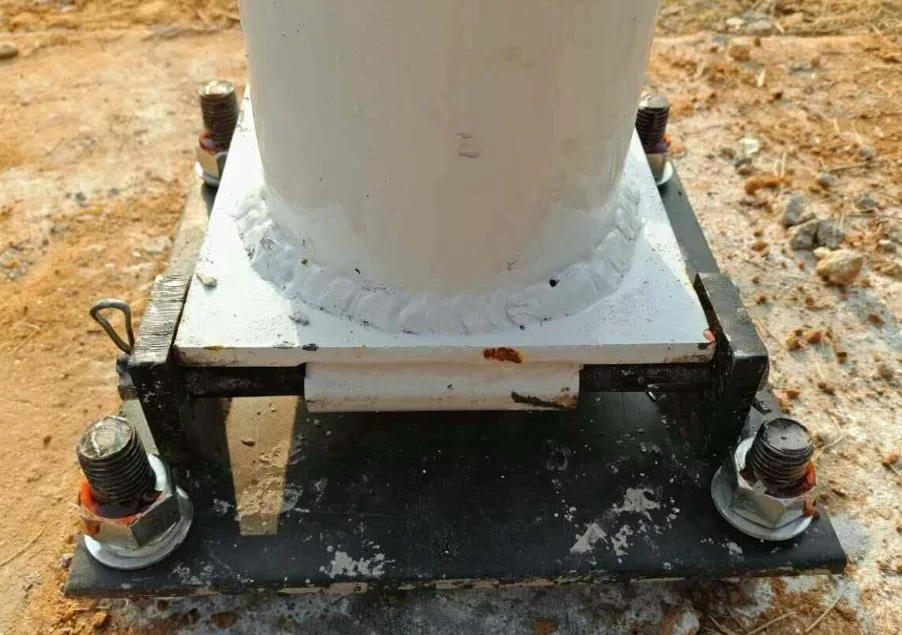
This serves as lightning protection and facilitates the subsequent connection of controller.
Cement is added to form the concrete. You have to wait 4-5 days (at least 2 weeks if the area is rainy) for it to fully set before the tower can be connected to it.
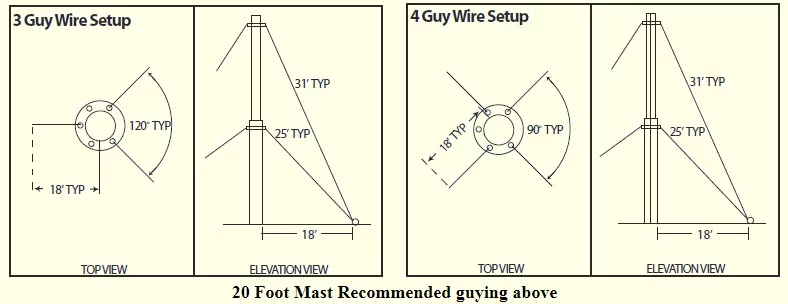
Depending on the tower height, we have listed the following anchor hole distances as a reference:
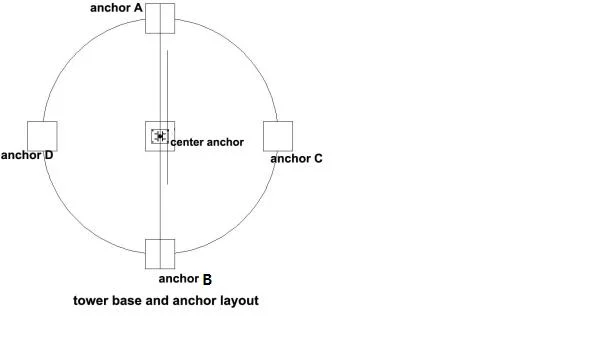
As you can see from the above breakdown pic, you might think wind turbines are complicated to install.
It is indeed relatively complex compared to a solar power system.
But in areas with abundant wind resources, installing it makes you completely energy-independent.
It supplies a constant stream of free electricity 24/7 and is a more powerful presence than the solar energy range.
Simply read this article and follow the steps for installation. This will enable you to reduce high electricity bills and eliminate the dilemma of no power supply.
Most people’s first choice is still the horizontal axis.
This is because the vertical axis costs 2-3 times more than the horizontal axis.
Therefore, we will take the horizontal axis wind turbine as an example for the installation demonstration.
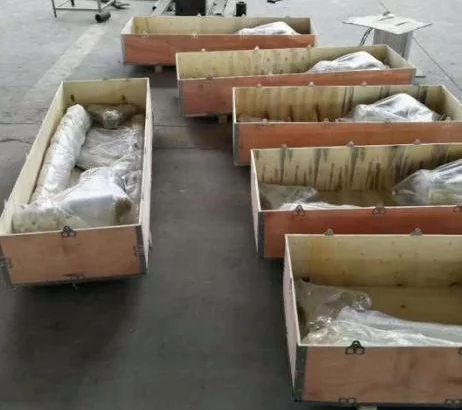
C: The blades of a horizontal-axis wind turbine are like airplane wings.
It is powered by a lift that resembles an airplane’s wings. The blades create kinetic and mechanical energy in a dance with fluid.
When installing it, it corresponds to L1=L2=L3, so that the wind blade is balanced before tightening the screws. The steps here are like Lego assembly, a fun and soothing process.
The assembled blade is then fixed to the nacelle. Add the wheel housing to secure the wind blades.
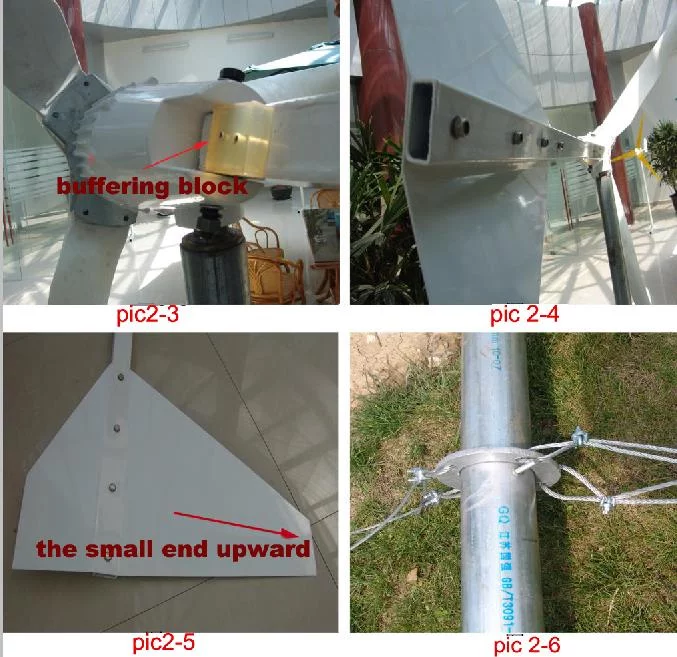
D: Attach the tail to the nacelle so that it can rotate 360° with wind direction change.
E: At this point, the wind turbine installation is complete.
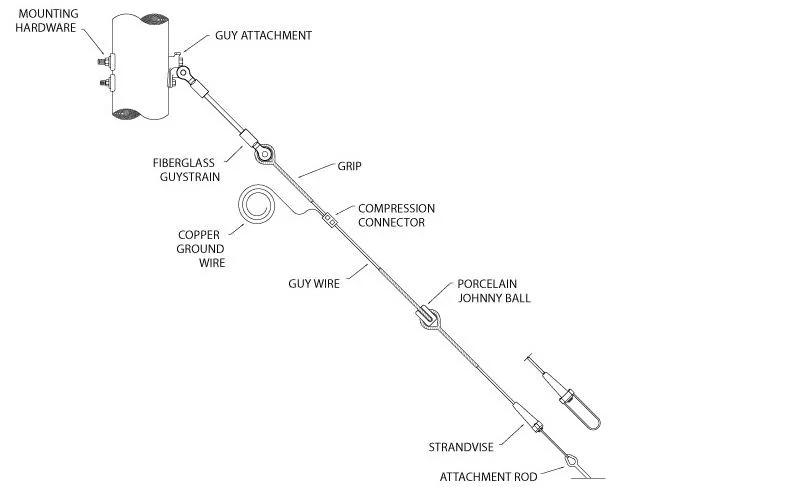
If we use guy cable rods, we also need to pay attention to the tie ropes being fixed at equal distances.
This is to avoid overstretching at one end, resulting in tower bending and deformation.
Remember, when we poured the concrete pier, we reserved the culvert and wires?
Wind turbines are connected to wind controller by this wire. Remember, it is recommended to install a 3P air switch between them that controls the power inflow to the wind charger.
Protect those who install and use it. Make sure to keep it closed to prevent current inflow before the complete wind energy system is connected.
If words and pictures can’t be visualized, you can also refer to the following video.
How do I connect batteries to a wind turbine?
Wind, like solar, is an intermittent renewable energy source that requires batteries or a strong utility grid to store its power. If you don’t have a utility grid, you will need batteries to store it.
You will need to choose which of their 2 types of energy storage is most suitable and connect it to the wind controller and inverter.
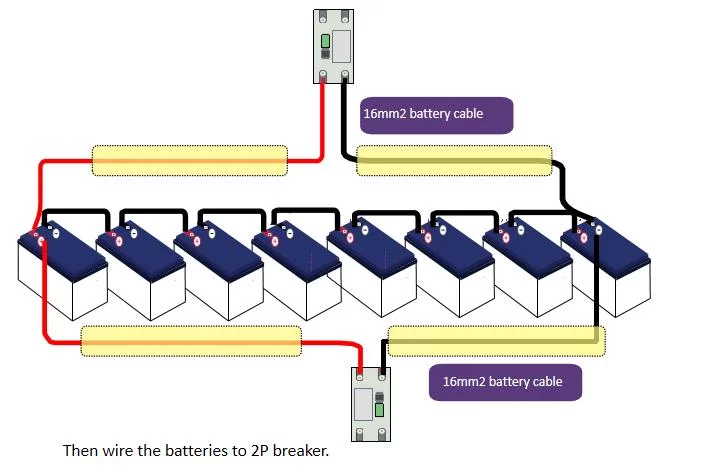
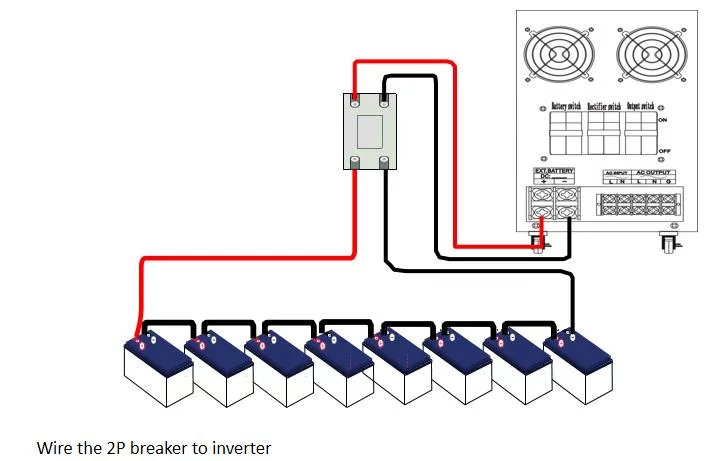
Below is a diagram of how to connect the gel batteries. Since the 10kw wind energy system is configured with 10 12v200AH gel batteries.
You will need to install the 10 batteries in series with the correct positive and negative ports.
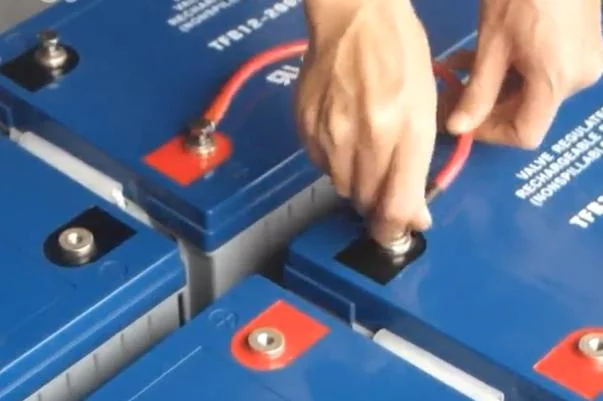
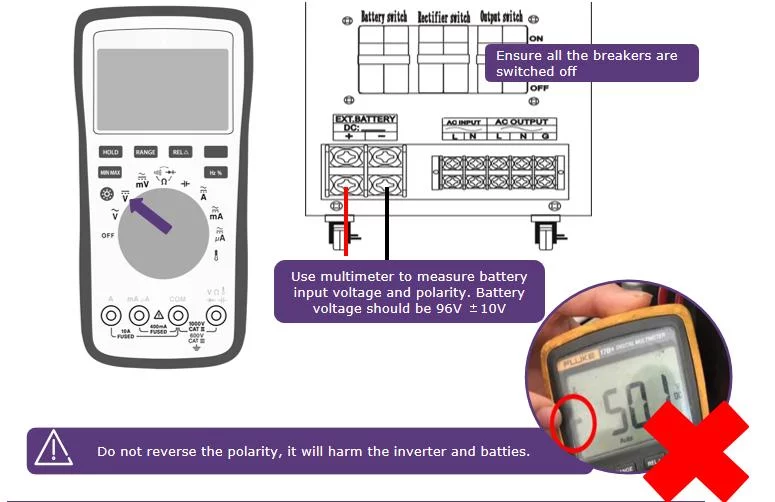
Then connect the 2 terminals of the air switch (closed state) respectively, so that they are attached to the controller and inverter.
Similarly, when we turn on and use it, we should pay attention to the opening order.
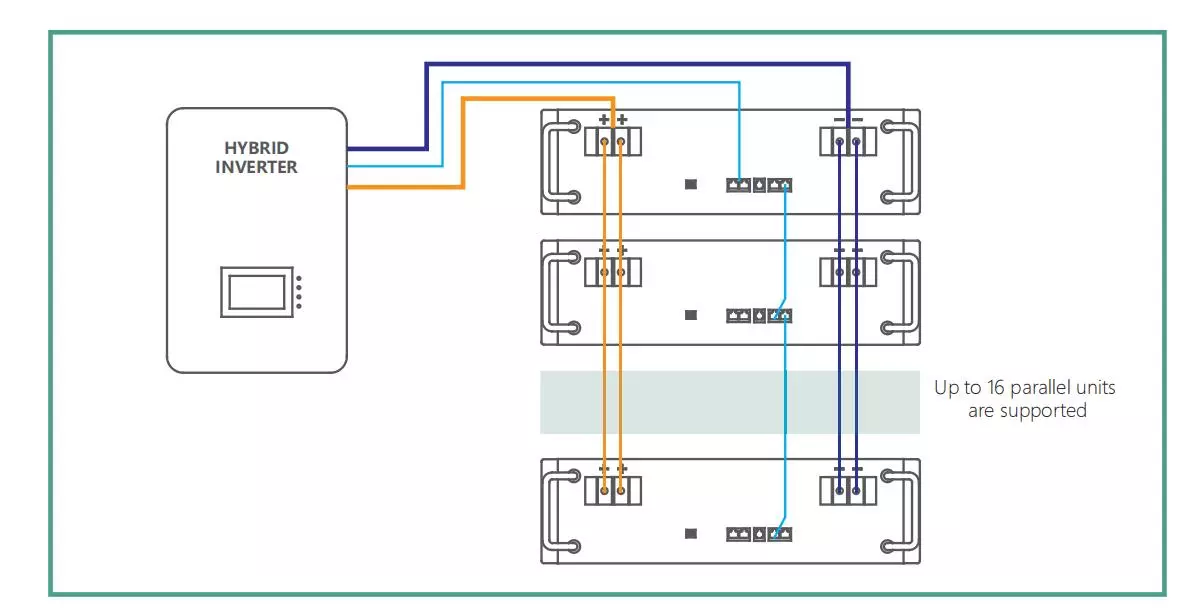
The lithium battery is connected in advance and delivered directly to your home or installation place. Then, connect the controller and the inverter to start working.
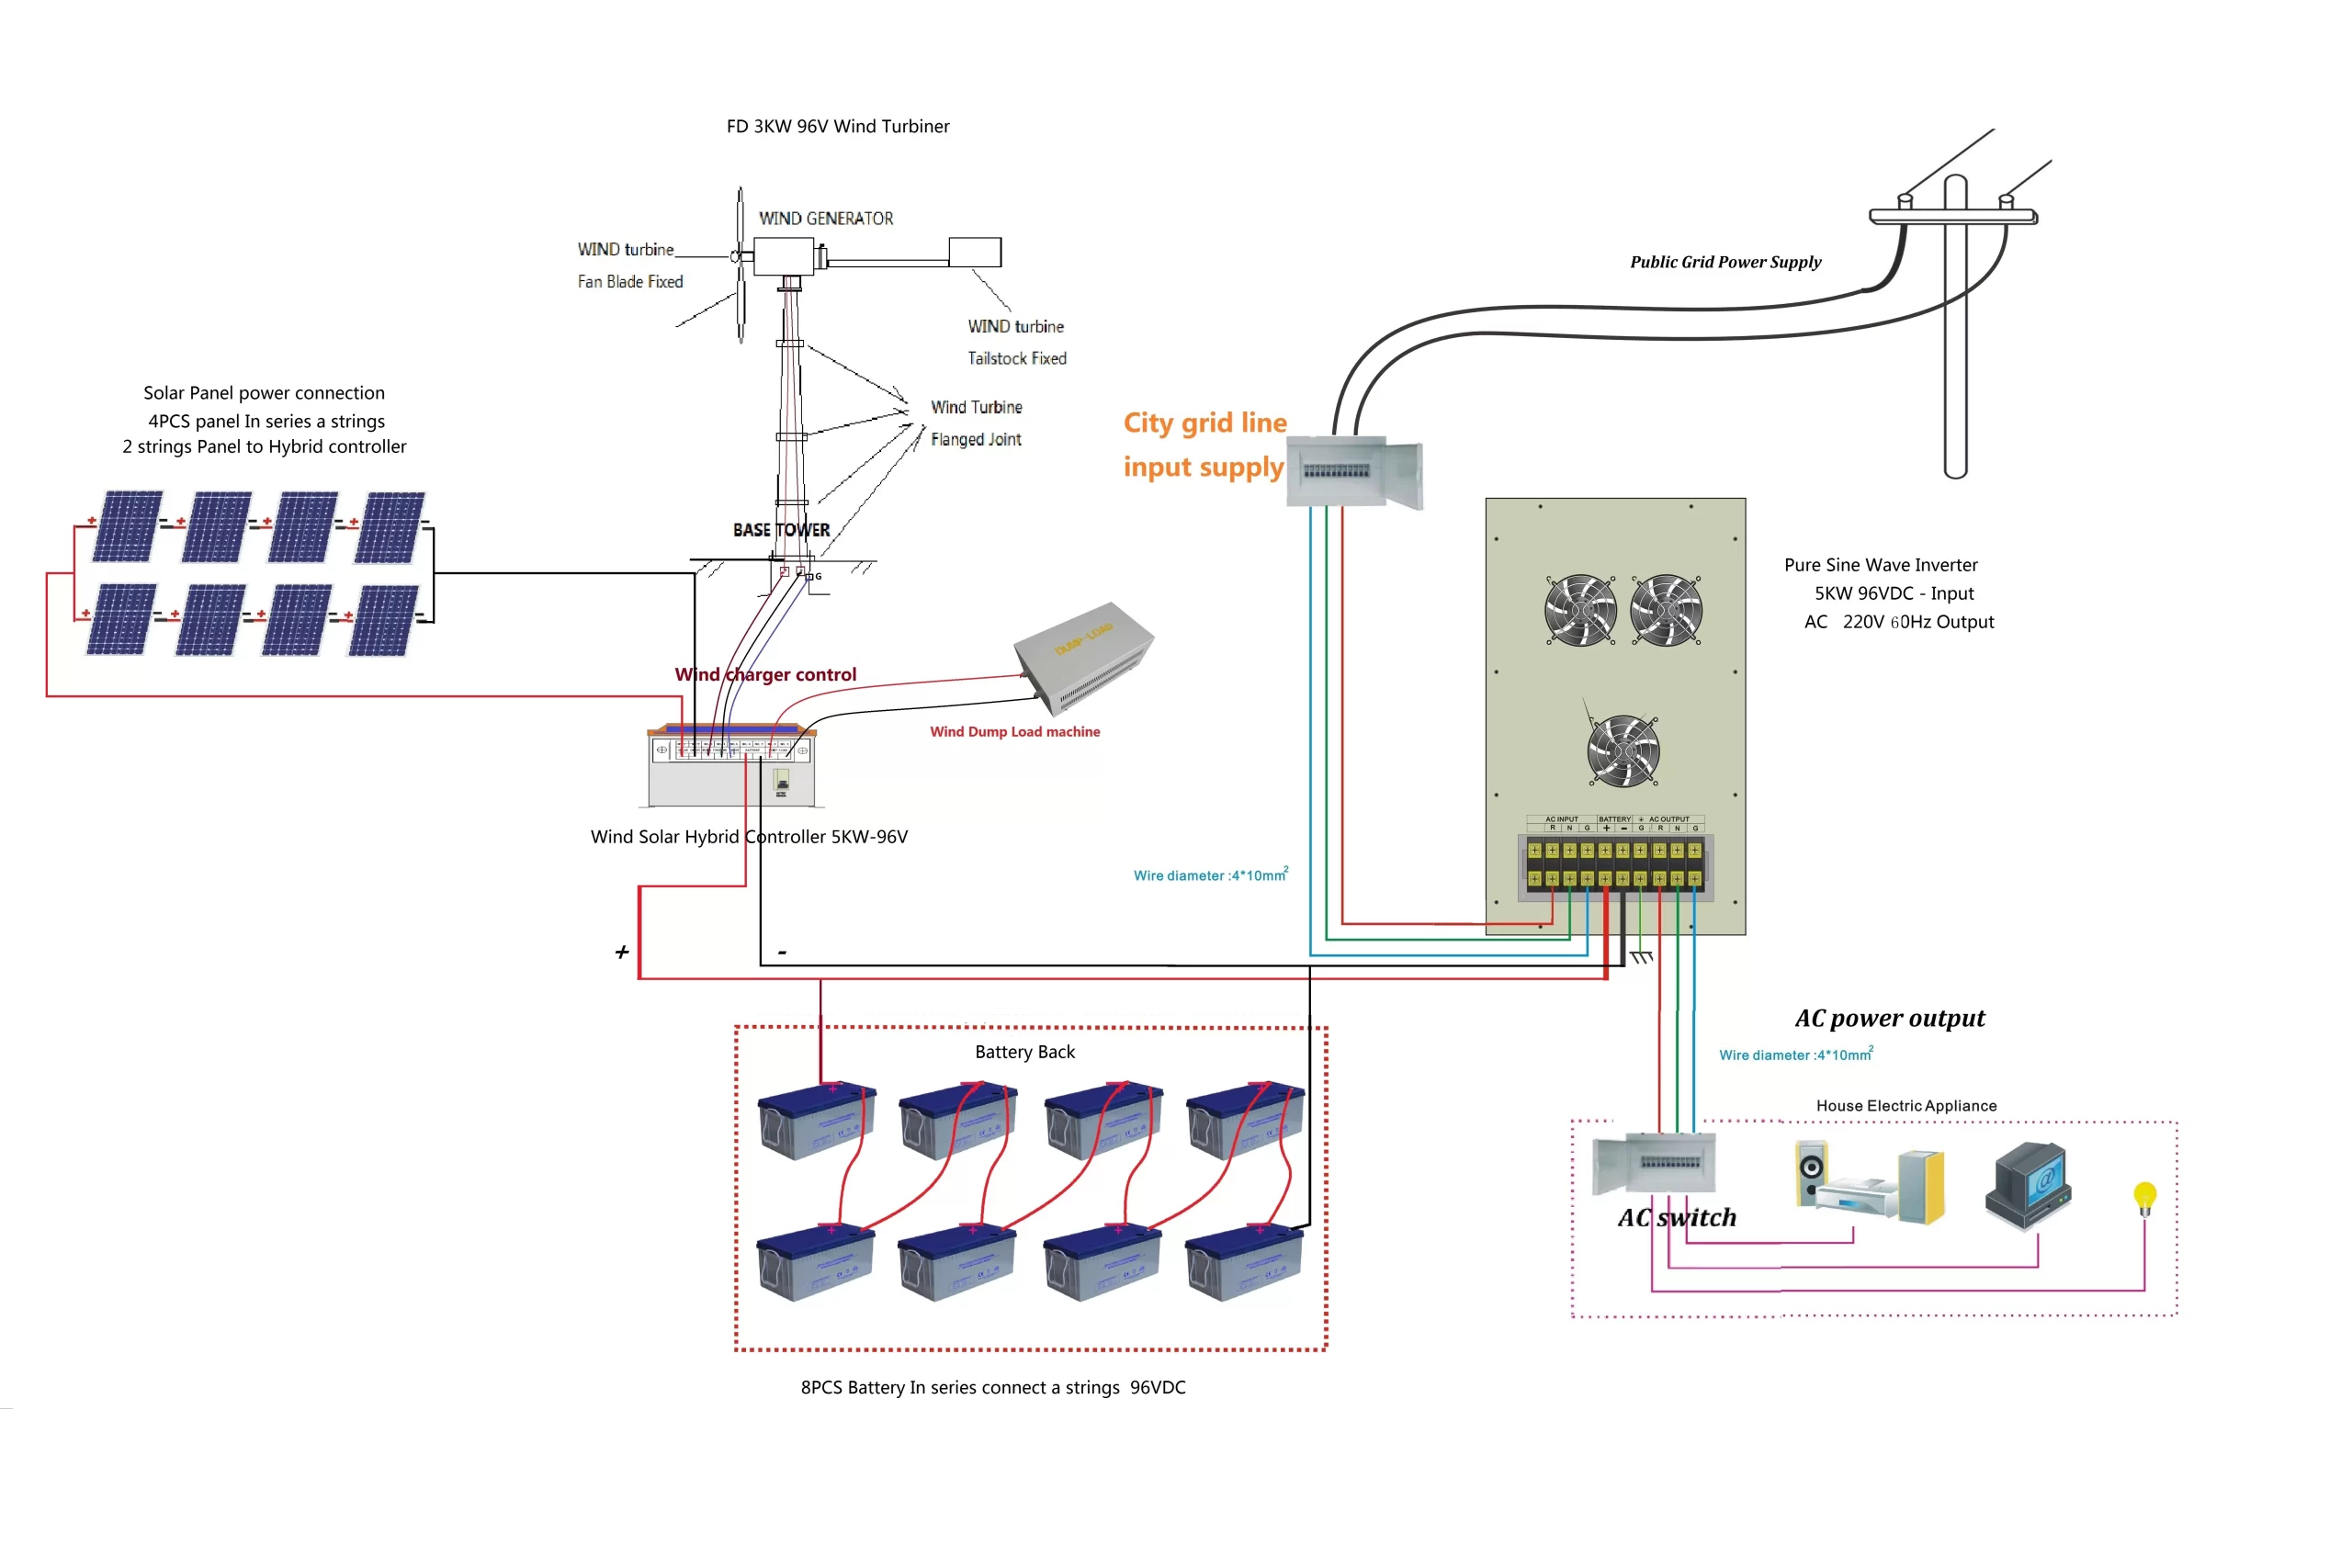
If you want to tap into the solar panels, the battery bank is the only point of intersection with the wind turbine.
We can know from the connection diagram below. You can also refer to this case study to understand how to make a wind and solar connection.
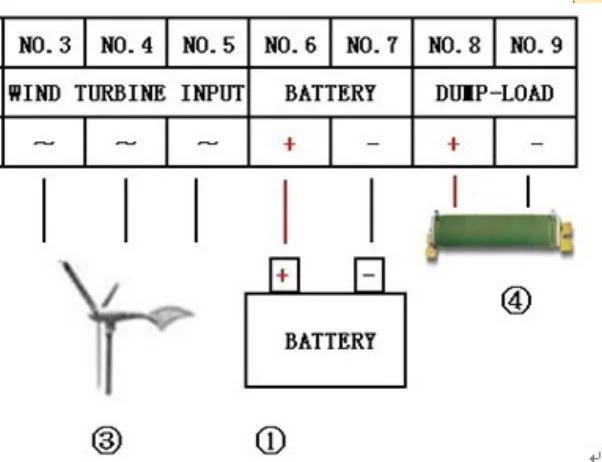
Wind charge controller
Notice! The battery pack is connected to the controller via an air switch.
The sequence of switching on for use is:
1- Battery pack with air switch
2- Wind controller
3-Wind turbines are air switch-open
The inverter completes the final power delivery
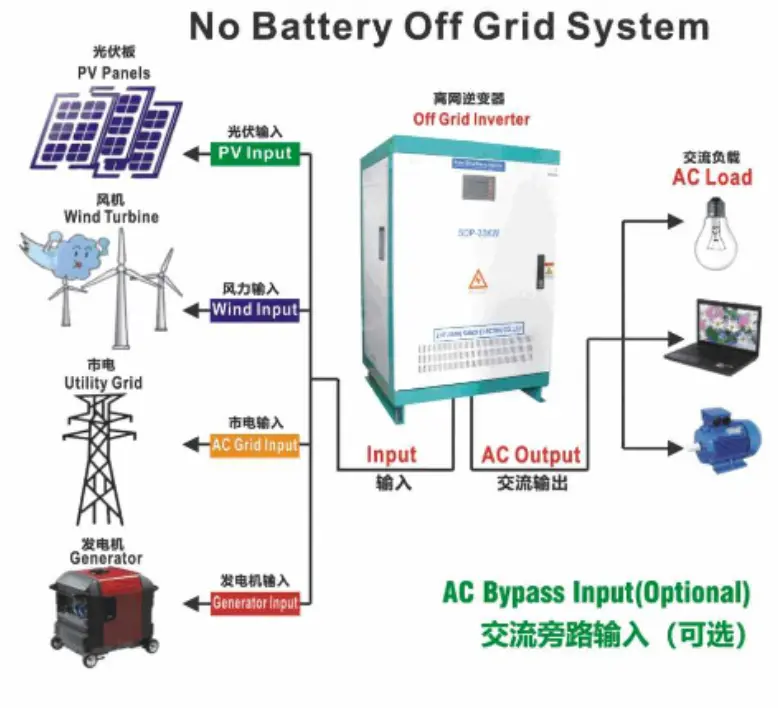
Wind or solar power is ultimately delivered to household appliances via an inverter (pure sine wave).
For different needs, inverters are available with utility priority, battery priority, and hybrid functions.
After installation, commissioning is also required. For commissioning and troubleshooting, check out this article.
